Tuesday, December 27, 2011

Hooded Towel

So, I finished up a hooded towel a few weeks ago and I just realized that I haven't shared it!  This is actually a gift I made for one of my cousins to give to another cousin for his little girl's birthday (which was also last week). 


Here's how you can do it.  I'm actually a little embarrassed to tell you how easy it is!  All you need is a bath towel and a hand towel.  If you want to add any embellishments you can used bias tape, rickrack, fabric, etc.  All you need to do is cut the  hand towel right down the middle.  This will leave each square piece with three finished edges.  Fold the towel in half like a rectangle. (Sorry I don't have any pics of this). You are going to want to trim the  unfinished edge about an inch or two and then curve the corner.  Then sew this up.  Attach the sewn hand towel to the center of the bath towel.  You can stop here or you can add embellishments.  On the last towel I added fabric strips to the hood and some applique hearts to the towel.  I usually embroider or applique the name.  I know this may not make sense without the pictures.  Maybe I will create some diagrams to help out...

Sunday, December 25, 2011

Happy Birthday and Merry Christmas

Merry Christmas!  Yay!  One of my favorite days of the year.  Yesterday was my other favorite day... my birthday!  I turned 27 and boy was I glad.  For months I thought I was turning 28.  I felt like I got a year younger when I realized I was only going to be 27.  I nearly had a nervous breakdown when I turned 25 because I was half way to 50.  I am so freaked out about hitting the big 3-0!  Yikes!
But, that's not what I got on to talk about.  I wanted to share some Christmas pictures with everyone.  Here are a few of the decorations we had at our house this year:


Merry Christmas!

Friday, December 23, 2011

Inspired by Pinterest

First things first....  This has been a very busy week of vacation.  I started off making two different kinds of fudge and some peppermint bark.  I was inspired by some pinterest recipes, however I tweaked them a little and ended up with one plain chocolate fudge, chocolate fudge with nuts and the peppermint bark.  I looooooove peppermint bark, but I was always afraid to make it (even though most recipes seem super easy).  When I found a bag of crushed peppermints at the grocery store I just had to try it out. 

This is what you will need:
  • equal parts of white and milk/semi-sweet chocolate. I used two bags of each.
  • peppermint oil or extract
  • peppermint pieces
  • some sort of double boiler contraption
  • cookie sheet
I just put the milk/semi-sweet chocolate on the foil & greased cookie sheet and stuck that in a 250 degree oven for about 5 minutes.  When it came out i just spread it around in a large rectangle that just about covered my entire cookie sheet.  Then, I sprinkled just a few peppermint pieces on top.While that was cooling I made a double boiler out of a medium sized pot and a metal bowl.  I got the water hot and steamy, but NOT BOILING.  I put the white chocolate chips in for about 5 minutes and I stirred just a few times.  Near the end I added some peppermint oil.  No, I did not measure it.  I just eyeballed and waited until I could just barely smell it.  I didn't want it to be too strong, but I definitely wanted to taste it.  I took this melted white chocolate and spread it over the milk chocolate and added more peppermint pieces to the top.  I placed mine in the fridge to chill.  After it was completely hard I chopped it up into reasonable sized pieces. 
After all of my sweets were done I sorted them and placed them in these cute little tins to hand out to our neighbors on our street.  Yes, we do that kind of thing around here and I LOVE it!  Our neighbor just brought over some homemade toffee last night and it was delish!


Now, on to my Pinterest inspired art!  All you need is a long piece of fairly thin wood (like one inch), cheap dollar store picture frames, spray paint and some pictures of various letters (I got mine from that flicker site on Pinterest).  First, I took apart all of my frames and removed the stuff on the back.  Then I painted the frames and the wood the same color. You may need to have your husband go out in the garage and cut your wood down.  Mine just happened to fit perfectly.  I also made one for my mom and diddles had to cut that one down just a bit...  And while he was out there he even routed the edges for me.  Fancy!


After I got my pics back in the frame I lined them up to make sure I liked them.


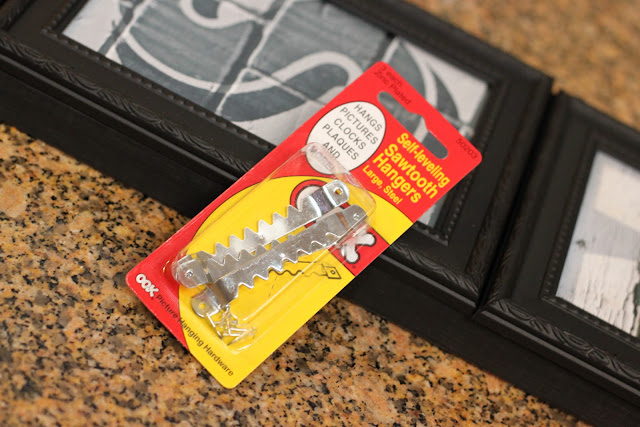
Before I used liquid nails to secure the frames I made sure to put a little hanger thing on the back.


I let it dry for a few hours before I hung it up (just in case).  And here it is now:

I pretty much LOVE it!  We needed some stuff upstairs.  We hardly even use our gameroom, but when I do go up there is is a little depressing.  Now it looks so much better, and these pinterest inspired canvases are also going to help make it look awesome.  If only I could decide what color I wanted to paint them.  Right now I think I'm going back to white.  I better decide before tomorrow.  No, it will have to be done today I cant work on my BIRTHDAY!  I almost forgot that my birthday is tomorrow...  Anyway... We are hosting Christmas for diddles' family this year and I want the house to look it's best.  I am sooooo excited.  Christmas is my holiday and I have always wanted to host the holidays at my house.  I can't wait!


And before I go I want to give recognition to my little garage troll that kept us company as we worked on these projects.  He isn't accustomed to visitors, so I was very grateful that the little demon didn't bite my arm off while I was in his domain.


AND, one more thing...  This is the awesome paint I have been using to paint my crafts.  I love the colors.  I love the finish.  I love the way it covers.  Awesome.  You can find it at Home Depot.

Sunday, December 18, 2011

I'm thinking

This is just going to be a three months out of the year kind of blog.  I really enjoy blogging to share my crafty creations, however I rarely have time or energy to blog during the school year.  And if I do have free time I usually spend it doing nothing because I am so worn out!  Anyway...  These last couple of weeks have been crazy.  This is (BY FAR) the worst school year I have had yet.  I really need to find a better school closer to home... Despite the stress, I have found time to make a few Pinterest inspired Christmas crafts/gifts.  Here are some ornaments I made for my team using floor wax, fine glitter and vinyl cut using my Cricut:


 I  have a few more things that I made as gifts that I am going to post after Christmas.  I'm really excited about them.  I think everything turned out super cute!  I'm even going to the store tomorrow to pick up a few supplies to do some last minute gifts just because I'm feeling super crafty.  I've been done with my gifts for a few weeks now, but I just can't stop.  Thanks a lot Pinterest! 

Monday, August 8, 2011

Pinterest... It's a love/hate relationship

So, I've had a Pinterest account for a while now.  But, I just recently became addicted.  I can't stop pinning!!!  I've mainly been obsessed with school related pins.  It has really motivated me to get back into my classroom (this is very good because I have to go back to work this FRIDAY).   I've found all sorts of amazing things I need to try out for this school year.  However, I can't stop pinning to actually get things done!
I did find some time to try out this cute gift I am going to give to my team that was inspired by Nothing But Country

And I made these awesome scratch off reward tickets using things I already had around the house!


And I've even made a few shirts... like this one:

Hopefully I will get some work done in my classroom this week and I can show more of the projects I hope to do!

Sunday, August 7, 2011

Chocolate Chip Cheese Ball

I've had several friends ask me for this recipe recently, so I thought this would be a good place to share it with everyone.  Several years back my family put all their favorite recipes together and created a family cookbook.  This little book has seriously become my cooking bible (this along with all my wonderful Pioneer Woman Recipes).  This is a sweet dip that is great for parties or other get together.  I usually serve it with teddy grahams because they are the perfect size and they wont break when you dip them.

Ingredients:
1 - 8oz pk softened cream cheese
1/2 cup softened butter
1 cup powdered sugar
2 tablespoons brown sugar
1/4 teaspoon vanilla extract
3/4 cup mini choc chips
3/4 cup finely chopped pecans or walnuts

Beat cream cheese and butter until smooth. Mix in powdered sugar, brown sugar and vanilla. Stir in chocolate chips. Cover and chill in the fridge for 2 hours. Shape it into a ball. Wrap with plastic wrap and chill for another hour. Roll the cheese ball in finely chopped nuts before serving.

Friday, August 5, 2011

Little Girl's Dress

This past week I made what might have been the easiest garment ever!  I just bought one of those cheap dollar patterns to make a dress for the same friend's little girl to wear on her first day of school next week.  I had it done in no time.  I even added some embellishments to make it super cute.  It probably cost less than $5 to make and I still have material left over!

Thursday, August 4, 2011

Nap Mat

I am so proud of myself for my latest creation.  Thanks to Jenny Garland I was able to make a nap mat for a friends daughter.  She is starting pre-k this year.  The directions were very easy to follow and I had it done in no time.  I know nothing about nap mats, but I thought the buttons and carrying strap were genius.  LOL!  Here are a few pics of the completed mat!


Saturday, July 16, 2011

8 Gallons of Paint

I haven't had as much time to blog as I had originally planned.  I've been very busy around the house.  I spent 3 days and 8 gallons of paint to address an issue I've had with the color that has graced almost every wall downstairs.  I affectionately call it "cardboard".  Don't get me wrong it isn't a terrible color.  I might even like it in certain situations.  But, I felt like there was soooooo much of it and it really was such a dark color that it made our house feel very cave like.  It was practically the same color as our floors.  I decided that I wanted gray walls.  I have a blue and green theme throughout the house and I thought gray would be a nice neutral....  After spending about a month seriously debating on the exact shade (not too dark but not too blue/purple or beige) I finally commited to Sharkey Gray and got 5 gallons of that crap!  I later came to regret that decision.  By the end of that day our house went from this:

To this:
And I absolutely hated how it looked against our floors.  It was the WORST around our fireplace.  It looks sooo blue and UGLY to me.  But, it looked amazing in our dining room...  I spent about 24 hours staring at it constantly telling Diddles how much I hated it and showing him new paint options.  We even had friends over during that 24 hour period and they said it looked fine.  Now I know who my true friends are because they straight up lied to me! haha!  So, the very next day I went out picked up a green and blue paint chip (the colors of our dining room and kitchen) along with a floor sample that was similar to ours.  I went to the light beige section and spent about 10 minutes before commiting to a light neutral shade.  This time I only purchased 3 gallons (just in case).  I had the entire downstairs repainted by the end of that day.  And I can't believe I'm going to say this..... But...... I LOVE MY BEIGE WALLS!  Never in my life have I ever liked neutrals.  However, with the floors, raised paneling details, fireplace, windows and all the other colors in our house I think it looks great!  Diddles seems to think I just repainted it the same cardboard color.  But, If you look below you can see that there is a BIG difference.


 Below you will see some during and after pics!


During


During


After


Saturday, June 18, 2011

Copy Cat

It's been a while since I last blogged.... sue me!  I hardly have any time or energy during the school year to get anything else done.  But, one one of our first days of summer Diddles made me this laundry basket shelf I have been wanting for months!  We have a good sized laundry room and there has always been a big empty section and I really wanted a shelf of some kind to store stuff in.  We have cabinets above the washer and dryer, but they aren't tall/deep enough for some of the things I needed to tuck away.  I added a shower curtain rod above this little nook to hang clothes to try and what not.  I think this is the perfect piece to use to store pool towels and such.  I originally had a vision of nice green or blue laundry baskets and a white shelf....  HOWEVER, I could only find white laundry baskets and the only paint color we already had enough of was this lovely blue from our bathroom at our previous house. I don't have any during pictures.  But here is what we ended up with at the end of the day (try to ignore the excessive amount of hangers that are waiting to be returned to the cleaners)...


And just to prove that I'm not being lazy and just sitting around on my bum...  I have been working on numerous shirts - like this one:

Sunday, April 10, 2011

Lazy Much?

I've had big plans to get some craftyness going around here....  But, it just hasn't happened and it really is not my fault.  I have made about three dozen shirts within the last couple of weeks (in between all of my busy stuff for work).  Today I might actually get some work done.  Yesterday I accomplished nothing. 

Well, you may see it as nothing.  But a trip to the farmer's market, lunch,  and lounging in and by the pool all day was a lot for me!  We finally got in our pool for the first time this year.  It was cold and I ended up with a nasty sunburn.  Here are a few pics from our day!
This is one of my favorite turtles.  He was so interested in what I was doing in his pen.


Don't let this cute face fool you....  He is evil!


Saturday, April 9, 2011

Seven Weeks.....

I can't wait!!!!  We get out for the summer in SEVEN WEEKS!  I have been ridiculously busy!  Some nights we don't get home from work until 8:00 or 9:00 (and we leave the house at 6:00 every morning).  I looooove my job, but it is hard work.  We have been doing standardized testing this week and it really made the week drag.  So glad that is over. Anyway, I just wanted to share some of the fun stuff we did at school during our "TAKS Camp" the kids (and teachers) had a ton of fun preparing and participating in camp.
We did that reverse bleach effect to make camp shirts.  Each class was a different "camp" and had a unique color and camp name.  My kids chose CAMP AWESOME.... because they are pretty awesome.  I think our shirts turned out wonderful!


Here you can get a look at how my room and hallway was is decorated.  We worked soooo hard on this and used just about all of the butcher paper that the school had (and that is not an exaggeration).  Therefore, it will be up until the last day of school.  And we have a second round of camp before the science test at the end of this month.

Friday, March 18, 2011

We're getting closer

The turtle pen/pool bench is almost complete.  And I'm pretty sure I love it now!  It looks sooo much better with stain.  Plus, we rearranged the patio furniture and I pulled all of the cushions for the furniture out of the garage (they have been sitting on top of Brandon's old Volkswagen for months now) and scrubbed the crap out of them yesterday.  And I do mean CRAP.... literally!  We have a very nasty dog that lives in our garage.  If you ever thought you wanted an English Bulldog you were WRONG.... and I mean seriously mistaken. 

Anyway... Back to the new piece of furniture in our back yard.  Here is a little sneak preview.  It will be so much better when I get all the cushions in place and the plants start to fill in!  We can not wait for SUMMER!  It's going to be sooooo relaxing sitting out by the pool EVERYDAY! 


And when you look carefully inside the structure you can see some of our box turtle friends...
And because I previously mentioned the English Bulldog issue...  Here is our little sweetness, Klaus.  You see him and just want to grab his little cheeks.  Until you start to approach him and he begins to growl.  We've decided it's a bad breed.  Don't let the pictures fool you!


I've got a Scentsy party tonight that I need to prepare for....  Tomorrow I have big plans to get some sewing done in the morning.  Perhaps I might actually get some new shirts done.  We shall see...